
Today I was listening to one of my favorite podcasts, the Microsoft Cloud Show (http://www.microsoftcloudshow.com/) and was reminded about Azure Cool Storage, something I read about when it was first announced a couple weeks ago, https://azure.microsoft.com/en-us/blog/introducing-azure-cool-storage/ but hadn’t a chance to try out yet.
I’ve been running my QNAP backups to hot storage for a few months now, but just upgraded all the drives in my QNAP TS-563 in the last couple of days, so now I have the ability to save nearly 16TB of content (5 x 4TB in a RAID 5). As part of this expansion, I had to redo my entire QNAP setup and figured I would take the chance to switch my backups over to Cool Storage to save myself about 50% on storage(if you don’t see cool storage, make sure you have a region selected that supports it, like East US 2). It also provided a great opportunity for a blog post!
Below is the process to getting it all setup, broken down into 3 simple steps.
- Setup your Azure Cool Storage
- Download and Setup the Azure App to connect to Azure
- Configure your Backup settings
Setup your Azure Cool Storage
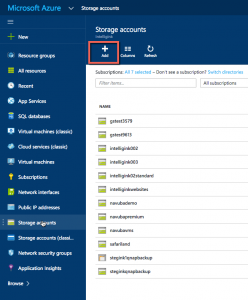
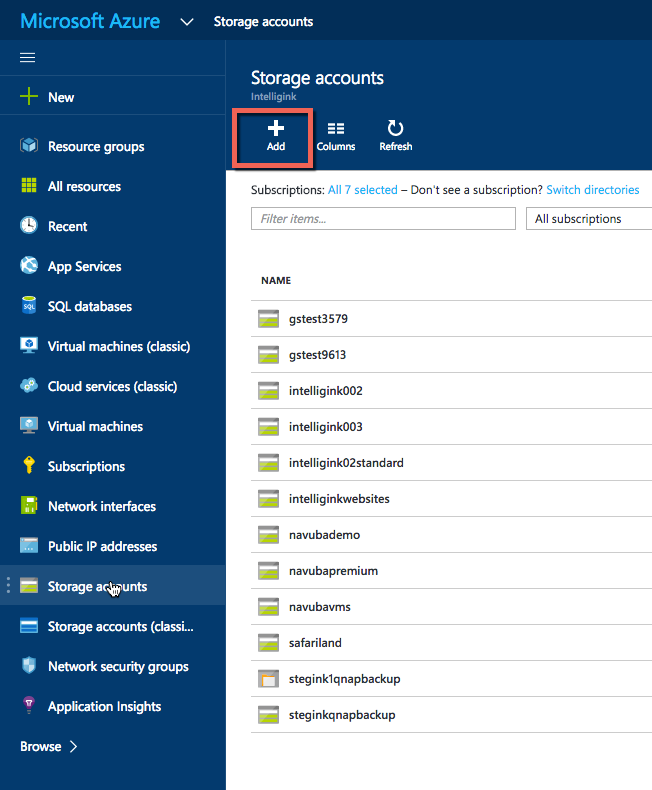
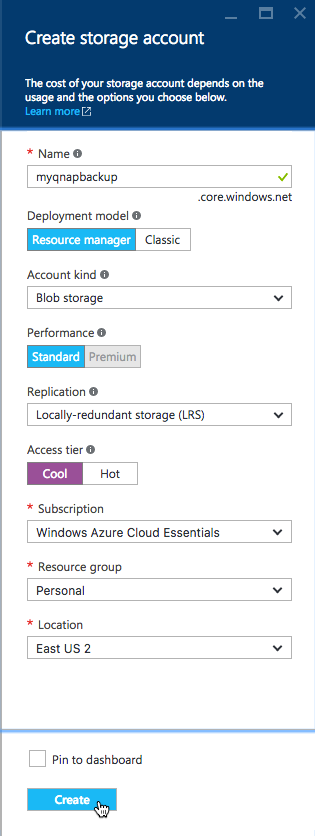
- Login to your Azure Portal and go to Storage Accounts
- Click to Add a new Storage Account
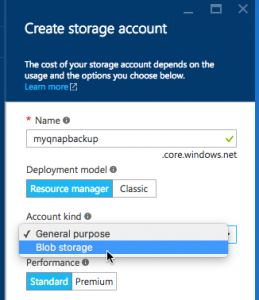
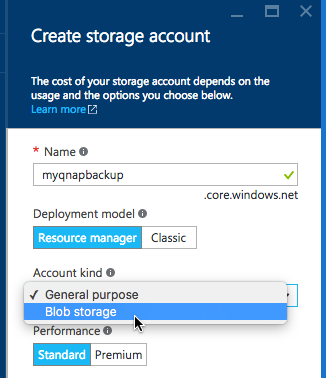
- Give you Storage Account a Name
- Insure the Deployment Model is “Resource Manager”
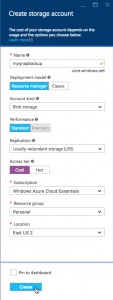
- Set your Account kind go Blob storage, this will lock you into Standard Performance and set Replication to Locally-redundant storage (LRS).
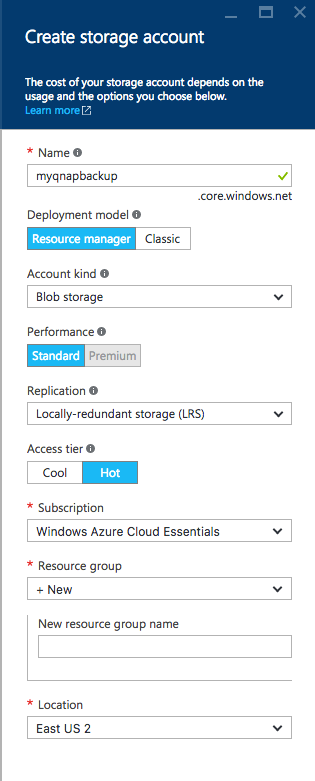
- Set your Access tier to Cool
- Select the Subscription you want to us
- Either create a new Resource Group or select one you already created

- Finally set the location and click Create
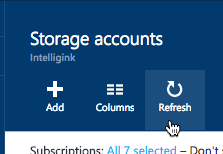
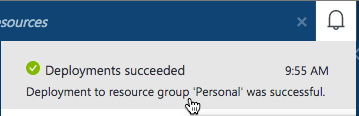
- Once the Deployment is Complete, we need to create a container for our backups

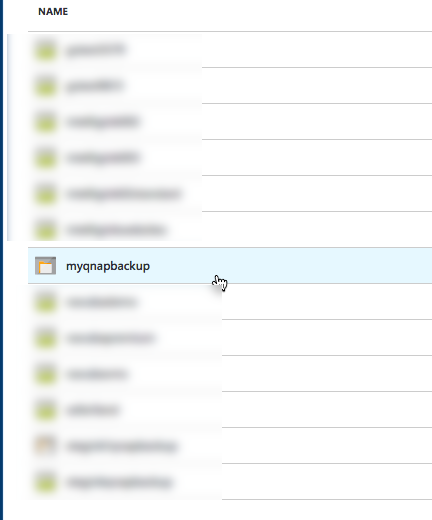
- Refresh your Storage Accounts
- Select the Storage Account you just created

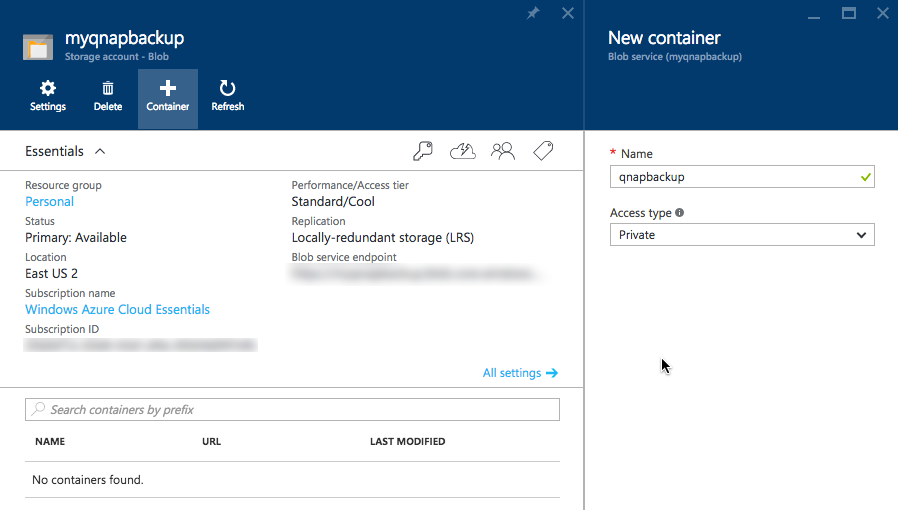
- Click to Create a Container
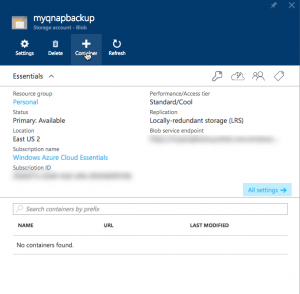
- Give the Container a Name, leave the Access type to Private (unless you want your backups publically accessible) and click Create

- Refresh your Storage Accounts
- You’re now ready to move on to setting up your QNAP Device

Download the Azure App on your QNAP and Configure it
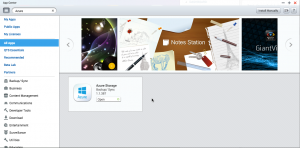
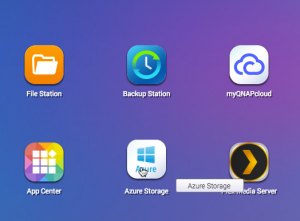
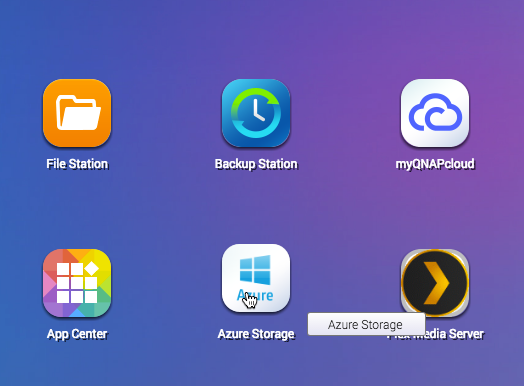
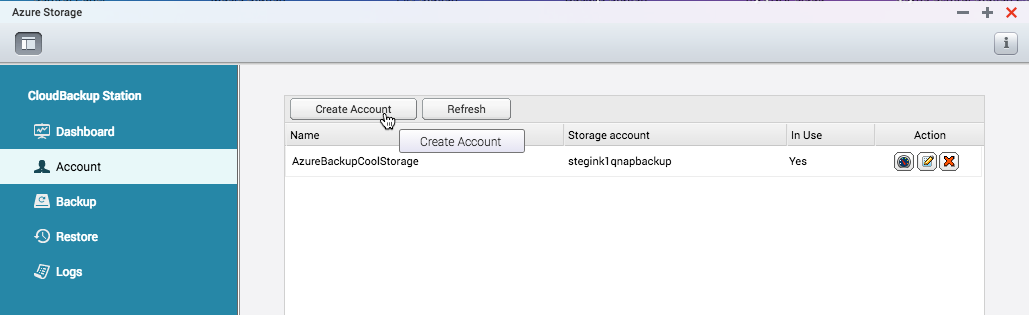
- The first thing you’ll need is the Azure App on your QNAP Device. Just got to the App Center, search for Azure. You should see the Azure Storage App you can install. In the screen shot below, I’ve already installed it.
- Once the App is installed, open it up to configure your Azure Storage Account
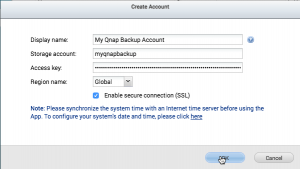
- In the Account tab, click to create a new
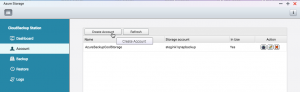
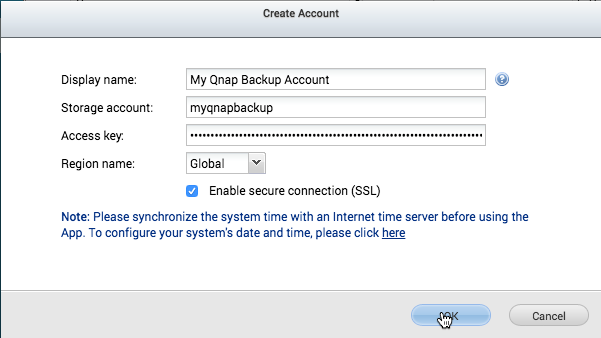
- Enter a Display Name, this is a friendly name and can be whatever you want
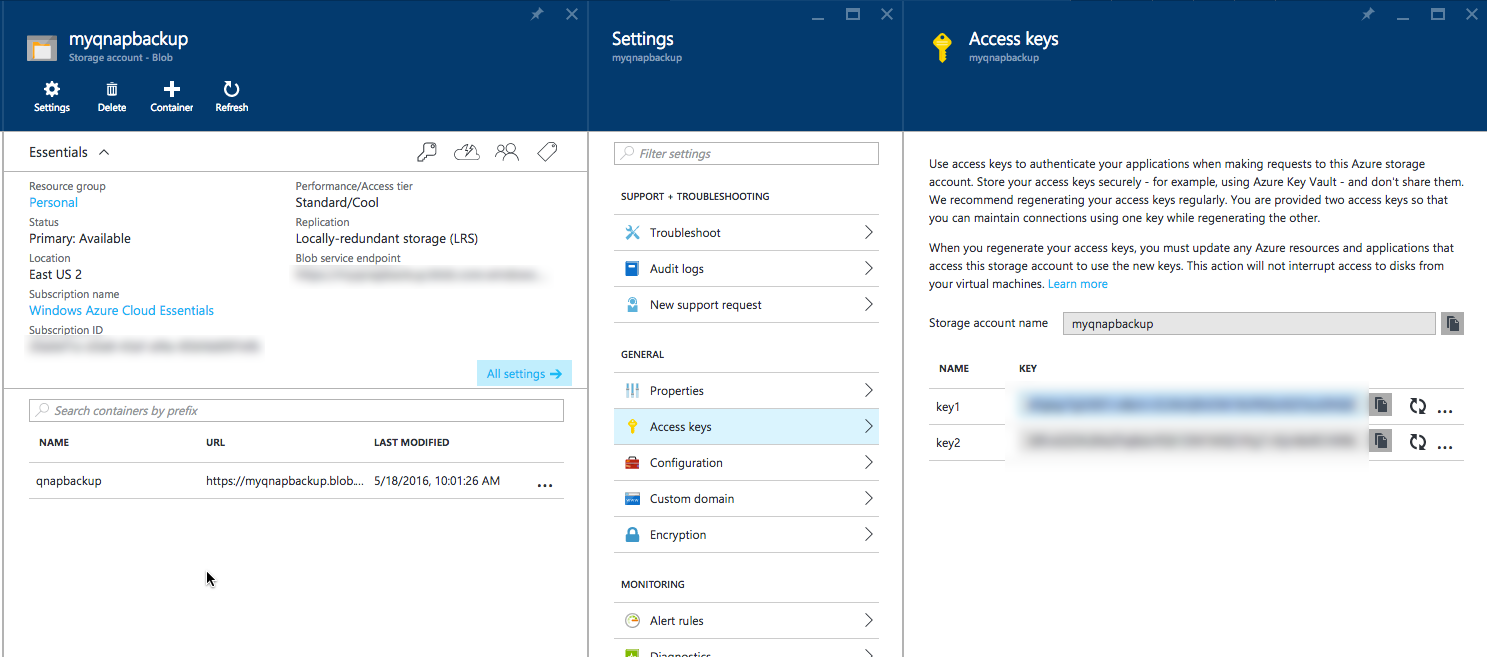
- Enter the Storage Account, this is the name of the storage account you just created. In my case it was myqnapbackup
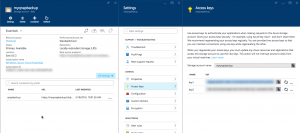
- Put in the access key for your storage account. You can get this from the setting of your storage account in the Azure Portal.
- If you’re in China, set the region. Options are only Global and China
- Click OK
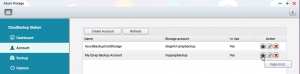
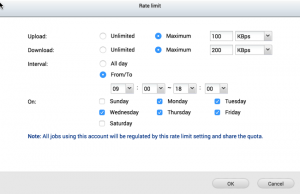
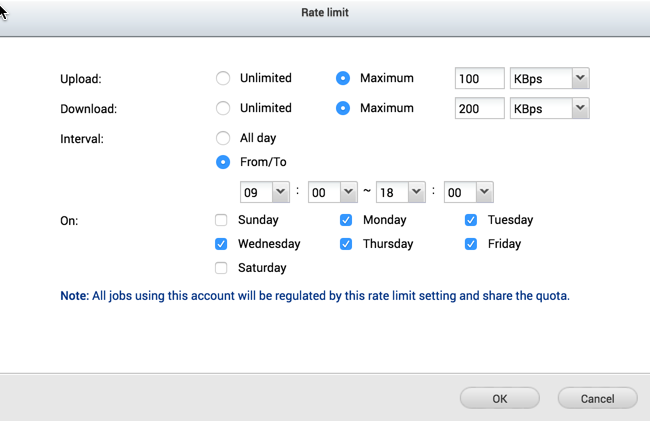
- One last setting I would recommend is to set the rate limit on your subscription.
- Configure the Rate Limit and the Days/Times the rate limit applies. I recommend configuring a rate limit during the times you’ll be using the internet. Without a rate limit the backup will consume every bit of bandwidth you have available. Click OK


Configure Backup Jobs
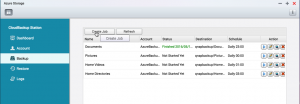
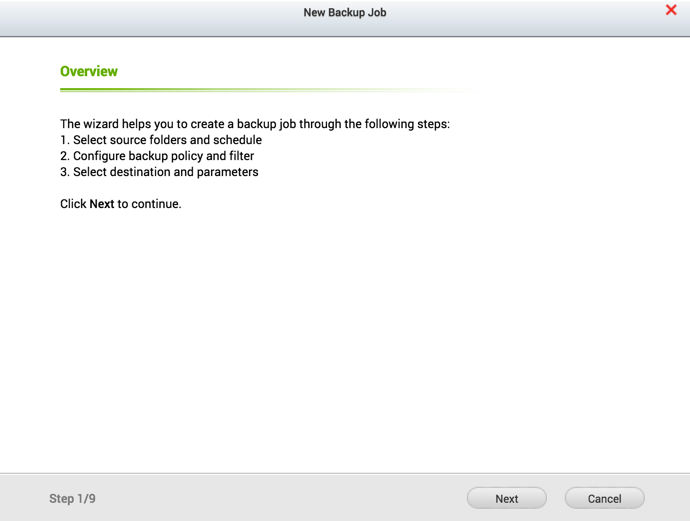
- Go to the Backup Tab and click on “Create Job”
- Click Next

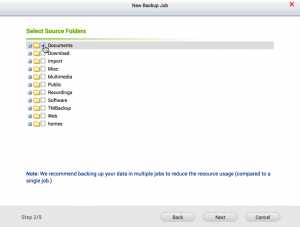
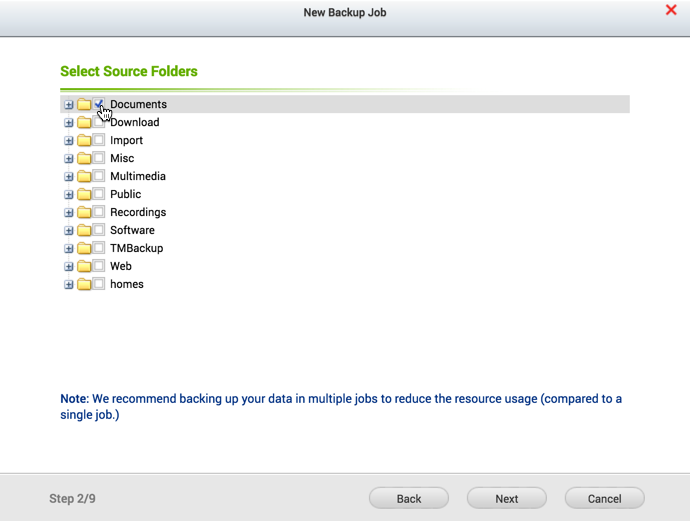
- Select the Folder(s) you want to backup and click Next
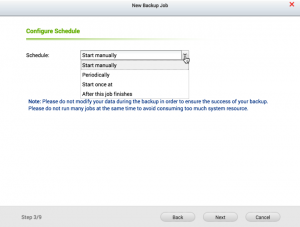
- Select the Backup Schedule, you have 4 options:
- Manually, you have to click start. You also have a checkbox to start immediately
- Periodically, Daily, Weekly or Monthly. Based on your selection you can select the number of times to run as week as well as days and times.
- Start Once, pick the day and time to run it
- After this job finishes, you can select another job that this job should follow. This prevents jobs from running simultaneously.
- After setting the schedule, click next to move to the next screen.
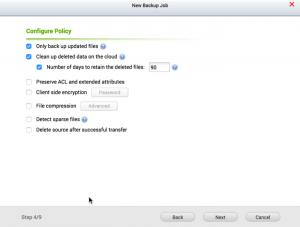
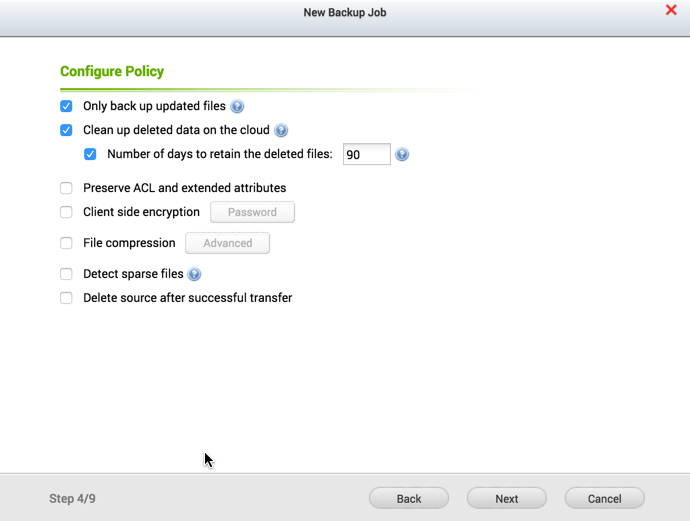
- Here you have several configuration options:
- Only back up updated files, i.e. incremental backup
- Delete files from backup that have been deleted from the computer. You can also specify how many days to keep the files in backup once they have been deleted from your computer.
- Preserve ACL and extended attributes
- Encryption and Compression Settings
- Detect Sparse files
- Delete files from the source after they have been backed up (don’t evern select this option and the second option 🙂 )
- Click Next
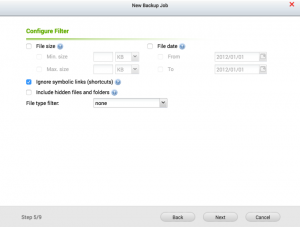
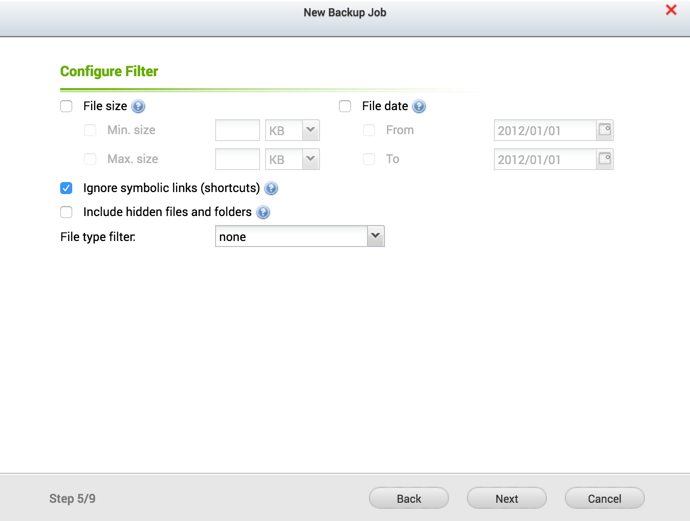
- You can also configure file filters to exclude files based on size and date. There are also options around shortcuts/symbolic links and hidden files and folders. Finally, you can also set inclusion/exclusion filters based on file types.
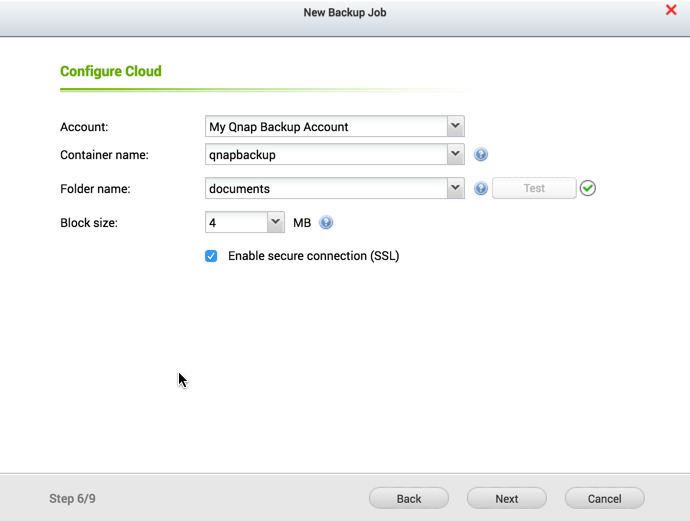
- Finally, you get to set the backup location by specifying the Account, Container name, and the folder name. The folder you select must be an empty folder. If you type in a new name, the folder will be created for you. You can configure the block size as well as if you want to SSL for the connection.

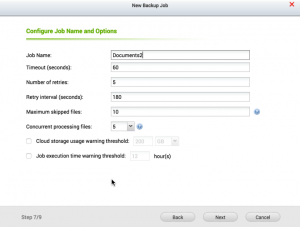
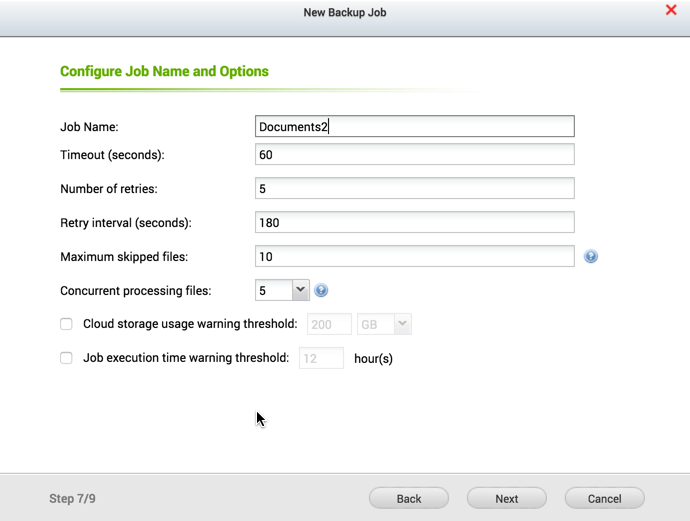
- Configure the Job name and Options as seen below. These are all pretty straight forward. Click Next
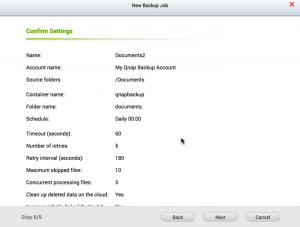
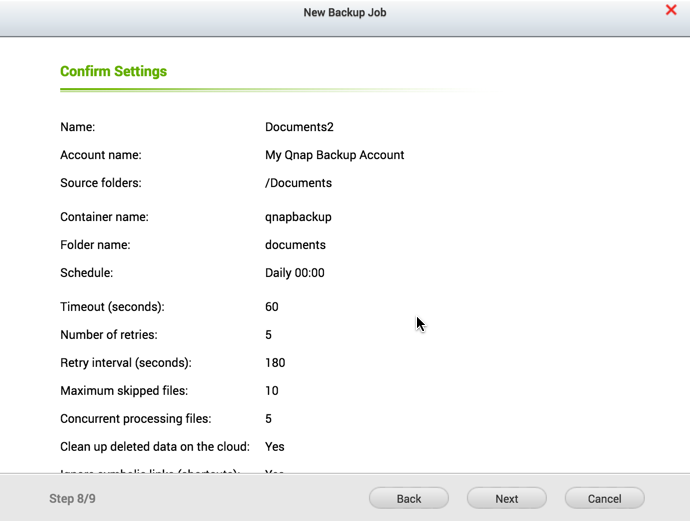
- Confirm your backup job settings. Click Next
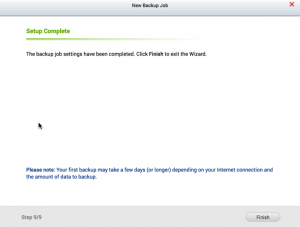
- Finally Click Finish


There you have it, your QNAP device will now backup all your files to Azure Cool Storage. As recommended in the configuration, I would break out your folders into multiple jobs so you can schedule them to run at different times to save on resources. You can also set your backup schedule according to how often files get updated. You may want to have some files backed up daily, while other may only need to be done weekly. Overall impressions so far is this backup option works really well and I love all the flexibility in configuration options.

