If you’ve been using IaaS, specifically Azure VMs, you’ll know that there are two different types of VMs you can have. Those running as “classic” or ASM and those running on the newer ARM. When you create VMs in classic mode you have the option to assign a DNS name to it. That way when you connect to the VM, it uses DNS rather than a public IP address. This had one big advantage, when you shut down your VM and booted it back up it had a different public IP address, but the DNS entry was updated. This enabled you to use the same connection file without having to look up the public IP address and change it or download a new connection file.
Using ARM, there isn’t an option to set the DNS name when you create it. When you download the connection file to connect to the VM, it contains the public IP address, not any DNS entry. If you dig around in the VM settings in the new Azure Portal, there isn’t any way to set it with the VM either. This means, every time you stop and start your VM you need to go find the IP address or download a new RDP connection file to connect.
The other day, I was getting fed up with this, and decided to dig deeper into the settings and figured out how/where you can configure the DNS setting for your VMs in order to use that in a connection file. Yea!!! Rather than try to take screen shots of the Azure portal (the whole blade design makes it kind of tricky anyways) the video below will demonstrate how to set it.
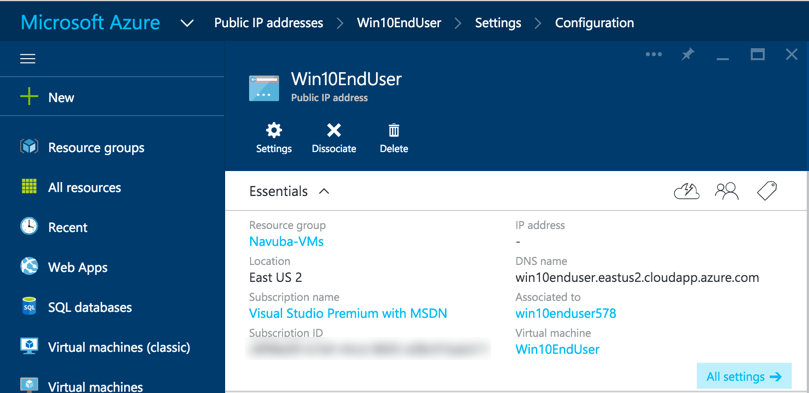
- Public IP addresses
- Select the Public IP Address named the same as your VM
- Click Settings
- Click Configuration
- Set the DNS name and click Save…wait for BOTH save and discard to become enabled again before closing the blade.
You’ll notice in the video that using Chrome it may say your changes will be discarded. The appears to be a bug with the web UI. Watch the color of the Save/Discard buttons when you save for an indication of when it’s been saved and then just double check to make sure the DNS entry was saved.


